Homemade Face Moisturizer – Easy DIY Face Moisturizer Recipe
There’s something incredibly empowering about making your own skincare products. Whether you’re trying to avoid harsh ingredients, save money, or just love a good DIY project, creating your own homemade face moisturizer is a natural way to care for your skin. With just a few simple ingredients, you can whip up a deeply nourishing, skin-loving cream that rivals even the fanciest store-bought beauty products.

I’ve been making my own DIY face moisturizer for a long time, and every time I smooth it on, it feels like a small act of kindness toward myself. And the best part? You can completely customize the ingredient list to suit your skin type, whether you’re working with dry skin, oily skin, sensitive skin, or mature skin. If you’re struggling with dark spots or sun damage, I recently shared a full guide on how to remove sunspots naturally using simple, skin-loving ingredients.
I alternate between this DIY face moisturizer and my mango butter blend depending on what my skin’s craving—both are gentle and deeply hydrating.Let’s dive into how to make your very own natural homemade moisturizer—a recipe that’s easy, effective, and totally customizable.
Why Go Natural?
Conventional facial moisturizers often contain synthetic fragrances, preservatives, and alcohols that can disrupt your skin’s balance and cause irritation. Making your own natural face moisturizer at home gives you full control over what goes into it. You get to choose every ingredient—from nourishing carrier oils and essential oils, to healing butters and hydrating gels—based on what your skin truly needs. If your face needs hydration, so do your lips—this tallow lip balm pairs perfectly with my DIY face moisturizer.
This DIY face cream recipe is packed with natural ingredients that offer real benefits: antioxidants to combat fine lines, antibacterial properties to help acne-prone areas, and essential fatty acids to support overall skin health.
Before applying this homemade face moisturizer, I love using my aloe leaf face mask to soothe and prep my skin—it’s like a mini spa day at home.
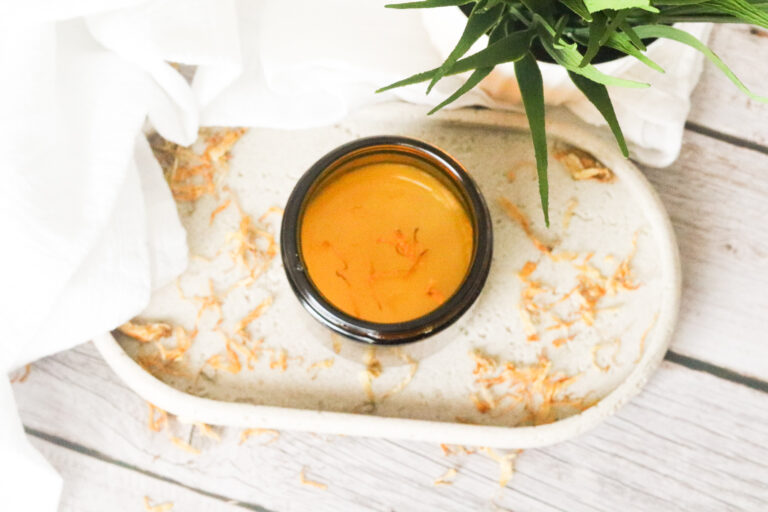
On days when my skin feels irritated or extra dry, I love reaching for my Calendula Salve—it’s like a herbal hug for your face.
Homemade Face Moisturizer Key Ingredients & Their Benefits
Here’s a breakdown of some key ingredients you can use in your homemade face moisturizer, and what they do for different skin types:
- Shea Butter – Rich and creamy, shea butter deeply hydrates dry skin and helps restore elasticity.
- Coconut Oil – Antibacterial and moisturizing, great for dry or normal skin, though it may clog pores in some with acne-prone skin.
- Jojoba Oil – Balances oil production and closely mimics the skin’s natural sebum, ideal for sensitive skin or oily skin.
- Rosehip Oil – Packed with vitamins A and C, excellent for reducing fine lines, improving skin tone, and supporting mature skin.
- Aloe Vera Gel – Hydrates and soothes without heaviness, great for calming irritated or sensitive skin.
- Vitamin E Oil – Antioxidant-rich and excellent for healing and extending the shelf life of your moisturizer.
- Lavender Oil or Tea Tree Oil – A few drops of essential oil can add antibacterial properties and calming effects.
You can find most of these ingredients at your local health food store, natural foods stores, or online at trusted sources like Mountain Rose Herbs. Pair this face moisturizer with my homemade beeswax lip balm for head-to-toe hydration using natural ingredients.
Homemade Face Moisturizer Recipe
Here’s my go-to homemade face cream recipe. It has a rich, creamy texture that melts into the skin and works well for most skin types.
Ingredients:
- 2 tablespoons shea butter
- 1 tablespoon coconut oil or olive squalane
- 1 tablespoon jojoba oil, argan oil, or sweet almond oil
- 1 teaspoon rosehip oil or sea buckthorn oil
- 1 teaspoon vitamin E oil
- 1 tablespoon aloe vera gel
- 5–10 drops of essential oil (like lavender oil or tea tree oil)
Optional: 1 teaspoon cocoa butter for extra richness, or a pinch of zinc oxide for natural sun protection.

Instructions:
- Melt the Butters: In a double boiler, gently melt the shea butter, cocoa butter (if using), and coconut oil over low heat. Stir until fully melted.
- Add the Oils: Remove from heat and stir in your jojoba oil, rosehip oil, and vitamin E oil. Let cool slightly, then add the aloe vera gel and essential oils.
- Whip for Texture: For a fluffy creamy texture, use a hand mixer to whip the mixture until light and smooth. This step is optional but gives your DIY moisturiser a luxe, spa-like feel.
- Store Properly: Pour the finished product into a clean glass jar or tin. Store in a cool dry place and use within 2–3 months for best results.

How to Use It
After cleansing, apply a small amount of the homemade face moisturizer using clean fingers. Massage it into your skin using a gentle circular motion, focusing on areas prone to dryness or fine lines. Use it on a daily basis, morning and night, or just as part of your at-home skincare ritual.

For best results, exfoliate once or twice a week before applying your face cream. If you’re looking for a gentle option, my Best Homemade Facial Scrub – Homemade Exfoliator for Face is a simple, all-natural recipe that leaves your skin smooth and glowing.
Tips for Customizing Your Homemade Face Moisturizer
- Oily or Acne-Prone Skin? Try lighter oils like grapeseed, jojoba, or argan oil, and avoid heavier butters. Add tea tree oil for its antibacterial properties.
- Dry or Mature Skin? Go for deeply nourishing options like shea butter, sea buckthorn oil, and avocado oil.
- Sensitive Skin? Always do a patch test on a small area before applying the full product, and keep essential oils to a minimum.
- Normal Skin? You’re lucky! You can experiment with a wider range of oils and butters based on your seasonal needs.
A Few Good Reminders
- Always use clean hands when applying your homemade moisturiser to prevent contamination.
- If your recipe includes water mixture (like hydrosols or distilled water), the shelf life will be much shorter unless you use a preservative.
- Keep your creams stored in a cool dry place, and avoid dipping fingers directly into the jar if possible.
- Label your jars with the ingredient list and date, especially if you like to experiment with homemade recipes and make small batches.
Why This Homemade Face Moisturizer Works
One of the best things about making your own homemade face cream is how effective it is despite being so simple. While mainstream moisturizers often rely on synthetic fillers, perfumes, and stabilizers, a homemade recipe cuts straight to the good stuff: natural ingredients that actually nourish your skin.
When you use shea butter, coconut oil, or jojoba oil, you’re not just moisturizing. You’re feeding your skin with essential fatty acids, antioxidants, and vitamin E that can help repair the skin barrier, soften dry patches, and even improve overall skin tone with consistent use.
Plus, ingredients like rosehip oil and aloe vera gel bring anti-aging and healing benefits that you can feel after just a few uses. The beauty of this recipe is how customizable it is—you can mix and match to meet your skin’s changing needs with the seasons or hormonal shifts.

More Variations to Try
If you’re looking to get creative or want a moisturizer that targets specific concerns, here are a few variations:
1. Calming Moisturizer for Sensitive Skin
- Base: Shea butter, jojoba oil, and aloe vera gel
- Add-ins: A few drops of chamomile essential oil and a little colloidal oatmeal
- Why it works: Soothes redness and calms irritation without clogging pores
2. Brightening Moisturizer for Dull Skin
- Base: Mango butter, rosehip oil, and aloe vera gel
- Add-ins: Vitamin C powder (just a pinch) and a few drops of lemon essential oil
- Why it works: Helps fade dark spots, boosts radiance, and improves overall skin tone
3. Rich Night Cream for Dry or Mature Skin
- Base: Cocoa butter, avocado oil, vitamin E oil
- Add-ins: A few drops of frankincense essential oil and carrot seed oil
- Why it works: Deeply nourishes while supporting elasticity and fine line reduction
4. Lightweight Day Cream
- Base: Aloe vera gel, argan oil, and a dash of rosewater
- Add-ins: A touch of zinc oxide for natural sun protection
- Why it works: Provides hydration without heaviness, ideal under makeup
Want to exfoliate before applying your moisturizer? Try my soothing Homemade Body Scrub – Easy Homemade Body Exfoliator, which pairs perfectly with this cream for ultra-soft skin from head to toe.
How to Choose the Right Oils for Your Skin Type
Knowing your skin type will help you get the most out of your DIY moisturizer. Here’s a quick cheat sheet:
- Dry Skin: Avocado oil, olive oil, shea butter, coconut oil
- Oily Skin: Jojoba oil, grapeseed oil, argan oil, aloe vera gel
- Combination Skin: Blend jojoba oil with shea butter or rosehip oil
- Sensitive Skin: Jojoba oil, aloe vera gel, chamomile oil, colloidal oatmeal
- Mature Skin: Rosehip oil, sea buckthorn oil, vitamin E oil, carrot seed oil
Don’t be afraid to experiment in small batches until you find the combo that works best for your unique skin.
Tips for a Longer Shelf Life
Because this DIY face cream is made without preservatives, you’ll want to be a little more mindful of how you store it. Here are a few tips:
- Use clean utensils every time you dip into the jar—no fingers!
- Store in a cool, dry place, away from direct sunlight.
- Add natural preservatives like vitamin E oil or rosemary extract to help extend shelf life.
- Refrigerate for an extra cooling feel and added freshness, especially if using aloe vera or hydrosols.
Generally, oil-based moisturizers can last 2–3 months without issue, especially if kept away from moisture.
The Feel-Good Factor of Your Homemade Face Moisturizer
There’s also a mental benefit to creating your own skincare. You’re connecting with your body, your needs, and nature in a very real, hands-on way. Every time you smooth on your homemade moisturizer, you’ll know that you crafted it yourself, using ingredients you trust. That’s a powerful form of self-care.
Not to mention, it’s budget-friendly, plastic-free, and better for the planet. You’re reducing your exposure to free radicals, cutting down on waste, and skipping the privacy policy-laden purchases that come with buying online from big-name brands.
Suppose you love rich textures and deeper hydration. In that case, you might also enjoy my Whipped Body Lotion – Natural Homemade Moisturizer, which feels like dessert for your skin and is especially great for dry legs, arms, and even baby bumps.

FAQ: Homemade Face Moisturizer
How long does this homemade face moisturizer last?
If stored properly in a clean, airtight container in a cool place, your DIY moisturizer should last about 2–3 months. If it contains any water-based ingredients (like aloe or rosewater), consider refrigerating and using within 3–4 weeks.
Can I use this under makeup?
Yes! Just apply a thin layer and allow it to absorb for a few minutes before applying makeup. If your skin is oily, use a lighter formula or swap in aloe vera gel as the base.
Is this recipe safe for acne-prone skin?
It can be, but be sure to choose non-comedogenic oils like jojoba, grapeseed, or rosehip oil. Avoid heavy oils like coconut oil if you’re prone to breakouts.
Can I make a big batch and store it?
You can, but smaller batches stay fresher. Oils can go rancid over time, especially without preservatives. Stick to small batches for the best results.
What essential oils are best for the face?
Gentle ones like lavender, frankincense, tea tree (in moderation), and geranium are great choices. Always do a patch test before applying essential oils to your face, especially if you have sensitive skin.
Do I need a preservative?
If your recipe includes any water-based ingredients (like aloe vera gel or rosewater), a preservative is recommended. If you’re only using oils and butters, a preservative isn’t necessary—but adding vitamin E can help extend the life of your cream.
Homemade Face Moisturizer - Easy DIY Face Moisturizer Recipe

I’ve been making my own DIY face moisturizer for a long time, and every time I smooth it on, it feels like a small act of kindness toward myself. And the best part? You can completely customize the ingredient list to suit your skin type, whether you're working with dry skin, oily skin, sensitive skin, or mature skin.
Let’s dive into how to make your very own natural homemade moisturizer—a recipe that’s easy, effective, and totally customizable.
Ingredients
- 2 tablespoons shea butter
- 1 tablespoon coconut oil or olive squalane
- 1 tablespoon jojoba oil, argan oil, or sweet almond oil
- 1 teaspoon rosehip oil or sea buckthorn oil
- 1 teaspoon vitamin E oil
- 1 tablespoon aloe vera gel
- 5–10 drops of essential oil (like lavender oil or tea tree oil)
Instructions
- Melt the Butters: In a double boiler, gently melt the shea butter, cocoa butter (if using), and coconut oil over low heat. Stir until fully melted.
- Add the Oils: Remove from heat and stir in your jojoba oil, rosehip oil, and vitamin E oil. Let cool slightly, then add the aloe vera gel and essential oils.
- Whip for Texture: For a fluffy creamy texture, use a hand mixer to whip the mixture until light and smooth. This step is optional but gives your DIY moisturiser a luxe, spa-like feel.
- Store Properly: Pour the finished product into a clean glass jar or tin. Store in a cool dry place and use within 2–3 months for best results.
Final Thoughts
Making your own homemade face moisturizer is not just a good idea—it’s a nourishing, creative, and fulfilling way to care for your facial skin. Whether you’re looking to simplify your skin care products, avoid synthetic additives, or just love the hands-on process, this natural face moisturizer will become a staple in your routine.
Next time you’re wandering the aisles of the grocery store or browsing your favorite health food store, consider picking up a few natural ingredients instead of that new product in the beauty aisle. With the right ingredients, a little patience, and a touch of love, you’ll have your own face cream—a homemade skin cream that supports your skin health in the most natural way possible.
Supplies You’ll Need:
- Shea butter
- Coconut oil or Olive squalane
- Jojoba oil, Argan oil, or Sweet almond oil
- Rosehip oil or Sea buckthorn oil
- Vitamin E oil
- Aloe vera gel
- Essential oil (like lavender oil or tea tree oil)
Click Below For more Body Care Recipes:
- The Best Homemade Facial Scrub – Homemade Exfoliator for Face
- DIY Whipped Shea Butter Recipe – Simple & Non-greasy
- Homemade Body Scrub – Easy Homemade Body Exfoliator
- Scalp Exfoliation for Hair Growth Made at Home
- How to remove sunspots naturally using simple, skin-loving ingredients.
- Tallow Lip Balm – Nourished Lips Made at Home
- Mango Body Butter Easy Recipe – All Natural Butter Mango & Oils
- Aloe Leaf Face Mask – An Easy DIY That Makes My Skin Feel Brand New
- Beeswax Lip Balm Recipe – A Easy DIY for Soft Lips